Entries Tagged 'Furniture' ↓
May 6th, 2010 — Furniture, Modern Furniture
Materials: Doors Billy Morebo, Ikea textile, glue gun, scissors
Description: During renovation of our toilet we decided not to use standard sanitary door and purchased two doors Billy Morebo from Ikea.We decorated them with Ikea textile and added several pictures with the same textile on walls.
More pictures of result and process see on our site prohandmade.ru. Enjoy!
~ Ekaterina, Moscow, Russia


May 6th, 2010 — Furniture, Modern Furniture
Materials: DUDERO, black paper, a fake mustache, white chalk, scissors and a knife.
Description: We bought the DUDERO – but we found it too plain and boring. So after pasting on a fake mustache, which made it look like Freddy Mercury, we decided to make the lamp into a pirate. See the result!
~ Rowan Zajkowski, Raamsdonksveer, The Netherlands


May 6th, 2010 — Furniture, Modern Furniture
Materials: PERFEKT Storage System
Description: Vino anyone? I love wine, but often had no place to store several bottles (My kitchen is about 90 sq ft). I used a portion of the Perfekt storage system to create a cute little wine cabinet in my kitchen. I removed the drywall and portions of 2 X 4s in the foyer to create a niche for the shelving system. I added supports on either side for a tight fit, then added molding on the outer edges for a finished look. Now I can store up to 10 bottles at a time!
~ Kim B, Jacksonville, FL


May 6th, 2010 — Furniture, Modern Furniture
Materials: Engan 2 drawer 2 door, catbox, motion sensitive light
Description: I followed the basic instructions but skipped the part about the drawers instead opting to use one of the side panels from a drawer to join the two drawer fronts together. Once attached using the 2 provided L bracket that were supplied + 1 other larger one I had bought at Ikea as well I mounted the drawer fronts to the unit.
With all parts together I put the back on but only nailed the top part down to the middle then used a jig saw to trim off the bottom half, then jigged out the cat door oh so very carefully.
The entry hole is protected around the edges with Ikea cable tube held on with the remaining nails from the backing. The bottom where the box is sitting on is one of the drawer bottoms.
Last steps were to add in a motion sensitive light and I added 2 more L brackets with another drawer side to act as a brace so the box won’t shift when in use. The concern was the cat could potentially trap himself in side.
~ mcquarris


May 6th, 2010 — Furniture, Modern Furniture
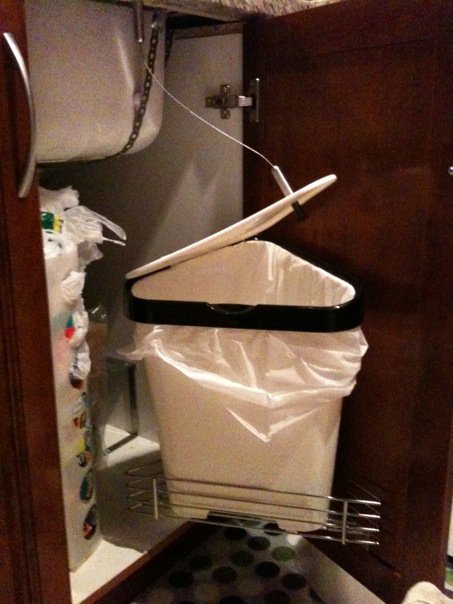
Materials: Bolmen Garbage Can, Blanken Corner Wall Shelf, Deka Curtain Wire w/ Clips, Ikea Knob from Dresser, Grundtal Rail Ends & Rationell Variera plastic rail guide.
Description: So when we moved to our new home I encountered a problem that I couldn’t find a garbage can that would fit under my sink, there wasn’t an auto open can small enough that could clear the pipes and such.
I bought the Bolmen garbage can as a temporary measure until I found something better. But one day, with a flash of brilliance, I combined it with host of other items I had and made exactly what I wanted.
The Grundtal Rail ends supply bottom support for the Blanken corner wall shelf to mount to with zip ties I had left over from some Ikea cord tubing I had bought.
The can itself is held in place using a Rationell Variera rail guide that was an extra we got in a package, the groove of the can fits nicely into the groove of the guide.
Lastly I used some spare Deka curtain wire minus the clips that was used for an art installation and fixed one end to the counter the other to the lid with just enough slack so when the door is opened the lid opens up.
I used a knob from an old Ikea dresser we had to attach to the other end of the Deka on the underside of the lid to provide a bit of weight to assist the lid return when the door closes.
Lastly I attached the can to the corner wallshelf with some screws, because sometimes when near empty the can would sometimes pop out and fall over.
Sounds like a lot eh? It was actually pretty easy.
~ mcquarris


May 6th, 2010 — Furniture, Modern Furniture
Materials: Besta shelf units, Inreda drawers
Description: I wanted something in our front hallway where we could store shoes, umbrellas, gloves, etc; put the mail and house keys; and have somewhere to sit when putting on or removing shoes (we like to keep the house shoe-free as much as possible).
I bought three Besta shelf units — two singles, one double — and screwed them all together in an L shape. The open shelves at the bottom hold shoes, reusable shopping bags and umbrellas. I installed two Inreda glass drawers up top to hold smaller objects, such as gloves, scarves, sunglasses, bicycle lights, etc. Up top I have some baskets for mail and keys, and I found three square cushions at a futon store that perfectly fit the width of the bench.
~ Ali, Melbourne, Australia


May 6th, 2010 — Furniture, Modern Furniture
Materials: Billy Bookshelves
Description: The room is in our basement and has this awkward ledge that runs across two walls. The area above the ledge was always challenging to decorate and seemed like wasted space. This solution provided an architectural focal point for the room as well as the one thing no kiddo can have enough of – storage!
before the built-ins
We used 5 Ikea Billy bookshelves (3 small and 2 large) to make this entire wall have “built-ins”. When we assembled the bookcases, we left the backs off so that we could paint the wall behind blue. We centered the bookshelves on the ledge and attached them with L-brackets so they won’t topple over. We took one of the shelves to Home Depot and had them color-match the paint. We then custom cut and fit pieces of MDF at each edge to cover any gap between shelf and wall. Lastly, we attached crown molding painted to match the shelves across the entire top to make it read visually as one unit.
Here is the cost breakdown:
Ikea Billy Bookcases – $270
Blue Paint – Free (leftover from previous project)
Black Paint to Match (1 quart) – $13
Wood for sides – $10
Molding – $19
L-Brackets – $6
Total – $318
See more on of Anne’s Billy Built-ins.
~ Anne Drager, Twin Cities metro


May 6th, 2010 — Furniture, Modern Furniture
Materials: BJURON plant pots in 2 sizes
Description: I bought 5 BJURON planters, 3 rectangles and 2 square ones. I painted the insides white so that my ornaments would stand out better and painted the outside with the same blue I used on the walls. I then drilled two holes in the top corners of each box and screwed them onto the wall. just the right size for displaying my doctor who models. 
~ Vicky, England


May 6th, 2010 — Furniture, Modern Furniture
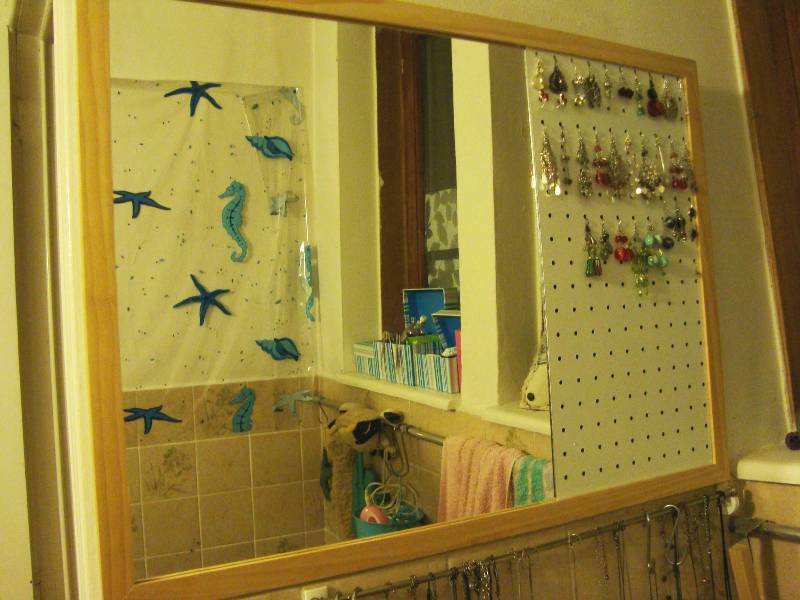
Materials: RAM Frame 50 X 70
Description: I desperately needed something to organise my jewelry – mostly earings – to avoid search crisis in the morning.
I had used a pegboard to arrange my DIY tools, so came the idea of using the same system for the jewelry.
I had a mirror cut 50 X 44 cm, cut a pegboard 50 X 26cm and painted it. I took off the cardboard and plastic window of the RAM frame, put the pegboard and mirror side by side, fixed them with the little black strips at the back of the frame and…tada !! So happy …
I’ll put some (pegboard) hooks or similar system to hang my collars at the bottom of the frame and probably will fix a tiny basket to put stud earings that cannot be hung.
~ Gerry, Belgium


May 6th, 2010 — Furniture, Modern Furniture
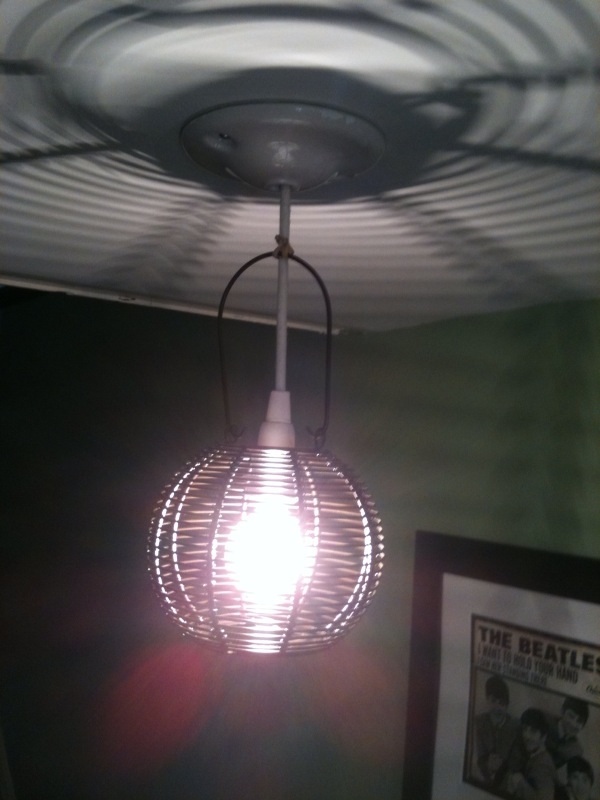
Materials: Knappa Pendant Lamp
Description: I took three Knappa Klover pendants and hard-wired them into the ceiling with porcelain canopies from the Burnside fixture I successfully begged Rejuvenation to sell to me. (They no longer do this, because too many people hack them but I’d bought one before they instituted that policy and convinced them I wasn’t remaking Burnside, which was true.)
The pendants were cool, but they got covered with dust and the plastic parts kept falling away from one another. Also, it was nearly impossible to change the lightbulbs. So I took off the plastic parts and had bare globe lightbulbs for a while. Until this week when I saw mesh wire candleholders in the Crate & Barrel catalogue. I ordered 3 of them, at under $8 each, and voila! The bottom piece that holds the tea light candle conveniently screwed right out. I removed the wire hanger from the tea light holder, slipped it up over the light bulb and Ikea socket, reattached the hanger and twist-tied it that to the Ikea pendant cord.
~ Robin Epstein, Brooklyn